How to Fix Knitting Mistakes on Circular Needles?

You are happily knitting a lovely sweater or a hat. Then, you set the needles down and go to make yourself a cup of tea or let your dog out. However, when you come back to continue with your stitching, you realize that you dropped a stitch as you set the needles down. Even worse, the stitch has fallen three or more rows down!

If you love engaging in knitting projects, you have most probably found yourself in such a situation. Such knitting mistakes usually leave one frustrated and annoyed. Read along to gain a better understanding of how to fix knitting mistakes on circular needles, whether you are an expert in knitting or a complete beginner.

HOW TO FIX KNITTING MISTAKES ON CIRCULAR NEEDLES

Fixing Mistakes in Circular Knitting

Fixing Mistakes In Circular Knitting

Circular knitting is a more advanced type of knitting, as compared to straight knitting. However, the good news is that fixing knitting mistakes in circular knitting is not as difficult as you may think. There is very little difference between correcting knitting mistakes in straight knitting and circular knitting.

Consider the following two common knitting mistakes and how to correct them:

a.) How to Fix a Hole in Knitting.

Fix a Hole in Knitting

In circular knitting, the projects are usually done from the right side. Therefore, when fixing holes in circular knitting, remember to focus on the right side of the project and start correcting the mistakes from that side.

b.) How to Fix the Beginning of the Round

Fix the Beginning of the Round

One of the most common knitting problems for beginners is losing the beginning of the round. This knitting mistake usually happens when the person drops the stitch markers, such that they can no longer tell where the round begins.

It is relatively easy to find the beginning of the round. The first thing you should do is find the tail of the scrap yarn at the edge of the cast-on. Then, look for the place where the tail meets the edge. From the edge, trace the path followed by the column of stitches up to the current row. When you find your current row, you will have found the very first stick of the round.

To ensure that you don’t lose the current row again, place a marker between the first and the last stitch. You can also double-check the current row by tracing back the sticks and looking at the most currently knit stitches.

Read our recommended knitting needle guide to know more about it.

Fixing Basic Knitting Mistakes
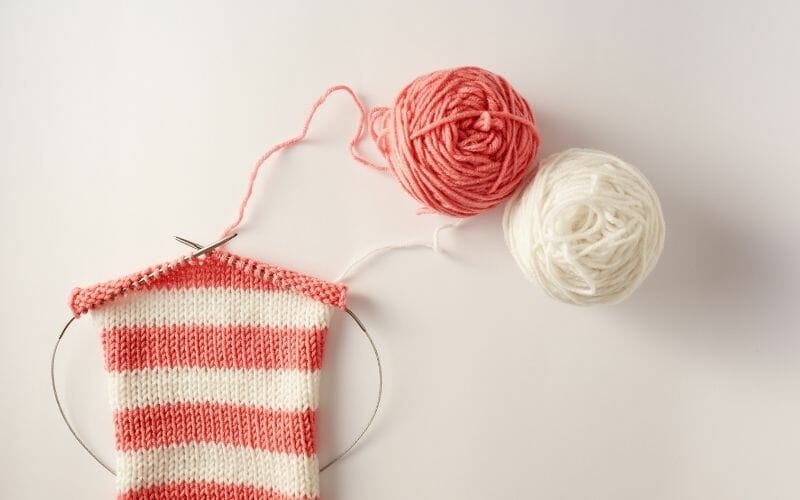
Basic Knitting Mistakes

The most basic knitting mistake made by the majority is leaving gaps on the cast-on. However, there are different ways that you can prevent creating this dreaded gap. For instance, using a tapestry needle or a crochet hook, pull the yarn’s tail through the first stitch. It is recommended that you pull the tail after binding off. Then, clinch the tail tightly, weave in the end, and no one will ever tell that there was even a gap there.

Also, for future reference, note that you can start knitting to prevent the gaps in the cast. For instance, you can start knitting using an invisible join during the cast-on. Alternatively, using both the tail and the working yarn, you can start knitting some stitches at the beginning of the round. These two knitting methods can help you avoid making the common knitting error of leaving gaps on the cast-on.

The following are more specifications and guidelines for fixing basic knitting mistakes:

  • Unknitting – With this laddering-down method, undo every new stitch; the new stitches should be undone from the right needle. Then, return the old stitches to the other needle, that is, the left needle.
  • Use a needle with a smaller gauge – The needle is used to rip out rows in your knitting project and pick up one loop in each stitch. Remember to use a needle with smaller gauges compared to the one you are using to knit.
  • Use a large loop – The loop is used for picking dropped edge stitches. The loop should not only extend from the edge located just above a smaller loop, but the knitted edge should also be well intact.
  • Pay attention to the needle’s stitch orientation – Tracing the stitch orientation can help you fix any twisted stitches and prevent more mistakes.

Check this guide to learn use of circular knitting needles for blanket.

Knitting 101: How to Fix Common Knitting Mistakes

Knitting 101

The following points highlight two common knitting mistakes and how to correct them:

1.) Forgetting the Direction you were Going

At times, you may be forced to stop your knitting and put it down, even at the center of the row. When you do that, you may forget the direction that you were going. In such a case, all you need to do is to ensure that you resume your stitching on the right-hand needle and not the left-hand needle. After all, your yarn (which is already connected to the ball) will be located just below your most current stitch.

2.) Very Tight Stitches

Very tight stitches have a disadvantage in that they are usually tough to move up the needle. The key to fixing very tight stitches is understanding the reasons for the high knitting tension. There are three leading causes of tight stitches;

  • Using the needle’s tapered part to make the stitches – To fix the knitting error, push the stitches back such that they are at the broadest part of the needle. Do this every time you are making a new stitch.
  • Tugging on your yarn – Instead of tugging on your yarn, hold it loosely to avoid tightening the stitches as you knit. When making new stitches, lift the right-hand needle gently, such that it is slightly bigger.
  • Holding the yarn tension very tightly – When holding the yarn, find the most comfortable tension. Alternatively, hold the yarn a little more loosely and gently in your palm.

Tools to Help You Fix Knitting Mistakes

Knitting fixing tools

To fix any knitting mistakes that you make, you will require several tools. You should always have these tools in your knitting bag, where they can be easily accessed. These must-have tools are:

  • Crotchet hooks
  • Waste yarn
  • Stitch markers
  • Small-double pointed needles
  • Tapestry needles

Post you may also like: How to fix crochet mistakes?

Conclusion

Knitting is an enjoyable activity. Yet, it is much more fun and exciting when you can correct your knitting errors. So, don’t be discouraged when you drop a stitch, or make tight stitches, or make any other basic knitting mistake. The above guide can help you correct those mistakes so that you can enjoy the knitting experience to the full!

Source:

Jane
Jane

Hi,
I’m Jane and I’m the editor of janesknittingkits.com! I am a long-time craft and clothing design fan who has been writing about these interests for years.

I have spent many hours studying knitting, weaving, sewing, embroidery, and quilting as well as learning about various brands and models of sewing gear and machines. In addition to this research, my work involves publishing information related to these topics in ways that will be informative for both amateur crafters like me and more experienced sewers!