A zipper pouch bag is a great project for the beginner sewist, and what better way to start sewing than with your own box-shaped zipper pouch. This simple project can be done in an hour or less, depending on how fast you work, and it’s perfect as a gift for yourself or anyone else who could use some organizational help! I’ll walk you through every step of the process so that there are no surprises. Let’s get started!

Gather your materials

Your next fave accessory is a box-shaped pouch bag! Here’s what you’ll need to make it:
One Fat Quarter Bundle – This will be the outside of your purse and cover up any seams on the inside that might show when you open it.
A 14″ zipper – Pick one color for this, so all zippers match together nicely, or pick two contrasting colors if desired!.
Woven Fabric – I recommend picking fabric with some stretch in case there are any changes in size throughout sewing time (doesn’t usually happen but can sometimes). I also like using cloth ribbon as an accent instead because they’re more durable.
Fusible Interfacing (this gives stability)
Quilting ruler – This is important for marking the measurements of your fabric neatly and accurately in order to cut it out correctly. You can also use a pen or tailor’s chalk if you don’t have any quilt rulers available.
Heat Removable Fabric Marking Pen -These pens are perfect because they’re erasable so that you won’t end up with permanent ink marks on your material when certain mistakes happen which would otherwise ruin an entire project
Rotary Cutter -this tool will slice through all types of fabrics quickly without damaging them.
Cutting Mat – these mats provide more precision cutting than just using table surfaces
Matching thread and easy-to-use clover wonder clips are the supplementary requirements for this project. However, other sewing supplies, such as a beginner sewing machine, ironing board, scissors, may also be needed depending on your skill level at making bags or pouches!
Step by step guide:
Step -01: Prepare the Fabric

First, you’ll need to prepare your fabrics for pouch bag making.
Fabric comes in many shapes and sizes which can be a bit overwhelming. To get started, first press the fabric until there are no more creases then lay it out on your work surface to measure how much you need for each piece of the pouch.
Step -02: Cut the fabric

Once the fabric is properly prepared, it’s time to assemble all of the pieces. Layout one outer fabric piece on a flat surface with right side up so you can cut two additional copies from it later as lining and interfacing material respectively. Carefully fold over this first layer in half lengthwise being sure not to crease any part of your pattern or drawing that may be printed thereon before unfolding once again.
Cut out the following measurements: Outer Fabric 2 pieces 10″ x 7 ½” Lining Fabric 2 pieces “10″ x 7 ½; Interfacing 4 piece 10″x7½” Coordinating fabric for zipper pull tabs 1 piece “2¼””x7”.
Read More: How to Cut Fabric with Silhouette
Step 3: Add Interfacing
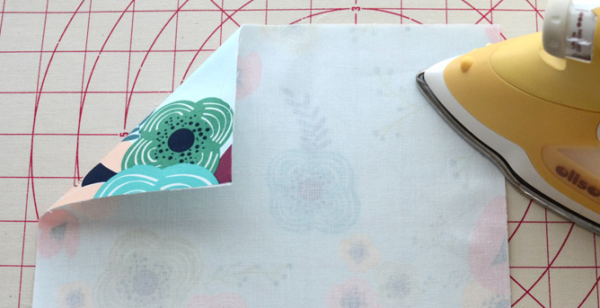
The process of adding interfacing to your garments is a crucial step that will make the final garment more sturdy. To add this layer, follow these steps:
1) Cut out an 1” x 6” strip from each fabric according to pattern instructions and fuse it in place on the opposite side with 10 seconds under hot iron heat;
2) set aside for now 3 pieces-2 Outer Fabric Pieces (one for inside lining and one for outside), plus Lining Piece;
3) prepare zipper by making sure there are no obstructions or rough spots which could catch your delicate fabrics as they go through them during sewing–mark any trouble points with tailor’s chalk so you can cut away excess later when we’re assembling our project.
Step 4: Zipper Placement

It’s important to measure your zipper before you start sewing. The easiest way is by measuring the length of its teeth, and then adding 3/8″ for seam allowance on either side (the two small lines). This will ensure that it’ll be long enough when we finish up this project!
Step 5: Clip Zipper

You’re almost there! Now it’s time to turn your fabric right side out. To do this, push the raw edges of the zipper into one another and pin them in place on both sides with a straight stitch using an invisible thread match. This is best done by hand because you want as little bulkiness from stitching near that raised edge as possible. Clip each end 3/8″ away from where you start and stop sewing so that when pressing or ironing later, these points will show up clearly at either end for easy alignment.
Step 6: Stitch Zipper

It’s time to put the zipper foot onto your machine. Start stitching on top of Second Line 3/8″ from the fabric’s raw edge, leaving this unstitched for now. But don’t forget about that third layer! This is what it looks like with a zipper-side up and you’ve left some space open in case something goes away during sewing (which we hope doesn’t happen!).
Read More: Sewing Machine with Foot Pedals
Step 7: Other Side of Zipper
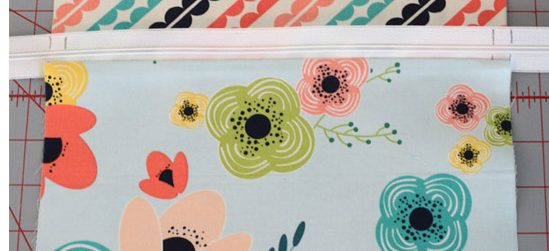
Attaching Zipper to Outer Layer of Fabric. Now tack the zipper onto one side, making sure that your stitching is done very close and tight against the teeth on both sides of the zipper. The fabric should be pulled tight at this point so it’s easier for you to sew through with an even pace without puckering any stitches in between them as well.
Step 8: Press Iron

You’re almost done! Step 8 is to press your seams flat with an iron. This will help everything stay in place, and make sure that the outside of your bag doesn’t get all wrinkled up during use or while it’s being stored away.
Step 9: Top stitching
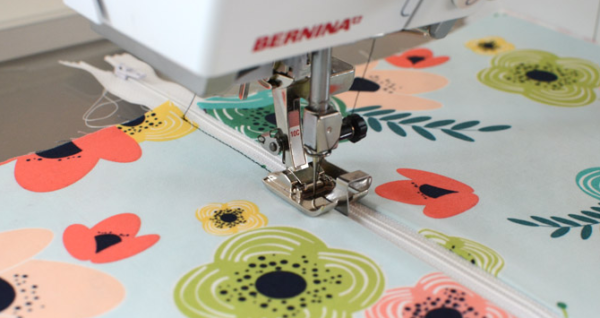
You have to make sure the fabric won’t get caught in your zipper when you’re using it by topstitching next to this one. You want to start 3/8″ from the edge and go all along that side of the zipper. Repeat on both sides if you have an Edge Stitch Foot, which makes a perfect job even easier!
Step 10: Sewing Lining
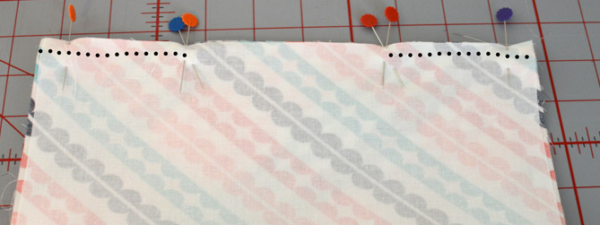
Pin the lining pieces right sides together. Be sure to leave a 3-4″ opening for turning, and put double pins at two stop points along the seam line where it is stitched down on either side of this zipper closure (to prevent popping open stitches). Use a 3/8in seam allowance when stitching with matching thread in an even progression from one end to another; back stitch after you reach each set of double pins before moving onto next set. This prevents your stitches from coming undone during use or cleaning process as they are highly likely to pop open if not back stitched twice over with matching threads!
Step 11: Stitch Outer Fabric
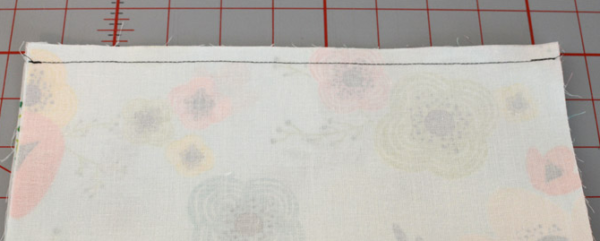
This may be the most tedious step in sewing a pouch bag, but it is important! The Outer fabric should have been cut at this point and pinned to match up with the inset. All you need now are some needles, thread, scissors, and iron (or sew on presser foot). Before stitching together start by folding over one of your edges so that they meet evenly – pin them down if necessary. You will notice 3 small lines running across these edge pieces; make sure not to stitch outside those boundaries or else your seams won’t stay flat when worn alone without another layer beneath like ribbon/lace etc. Sew around all four sides using 1-inch seam allowance stitches, then turn the outer layer inside out through opening left for turning purposes.
Step 12: Press Open

You’re almost done with your project! Make sure to press the seams away from the zipper so it will zip up smoothly. When you flip over and press open one side of the lining fabric, make sure that you line up this edge when pressing on both sides. The opening for zipping should be lined-up too so there are no gaps between fabrics once sewed together
Step 13: Make Tabs for handle

Grab your 2 1/4″ x 7″ tab fabric and fold the right sides together, then using a 1/4″ seam allowance stitch down the long edge, leaving two 3-1/2 inch lengths open on one side so that you have three sections when completed–one lengthwise strip with no openings (the middle), another width wise strip without any opening in it (on top) and finally an unfolded section along which there is now only one opening left.

Next Fold in half lengthwise and cut each of these strips into two pieces; this creates four identical rectangles approximately 2″x3½”.

Step 14: Side Seams

The following steps will help you hem the side of your bag. For this step, only work with Outer fabric and make sure not to include Lining Fabric in any part of these next few steps! Flip one end over so that right sides are together. With each tab facing towards the zipper stop on either side and insert a tab as shown below:

Pin it into place securely but be mindful about catching too much material from lining or other fabrics when pinning tabs down at corners (as seen below).
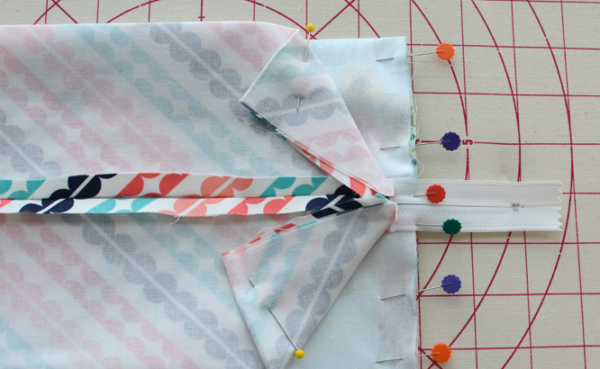
Next, fold both sections up like an envelope flap and stitch it nicely – stitches here should reinforce all four edges to keep them from moving around while sewing.

Next cut the excess zipper end.

Step 15: Open Zipper

You may not be able to turn your bag in the round if you do not open up most of the zipper.
Step 16: Hold the fabric securely

Repeat Step 11 on the opposite side. You will need to take a few additional precautions because your zipper is now open. I find it helpful to pin my safety pins in place so they don’t scratch me as I sew over them with needle and thread, or use tape for those pesky needles that are always rolling off of surfaces!
Step 17: Sew Lining
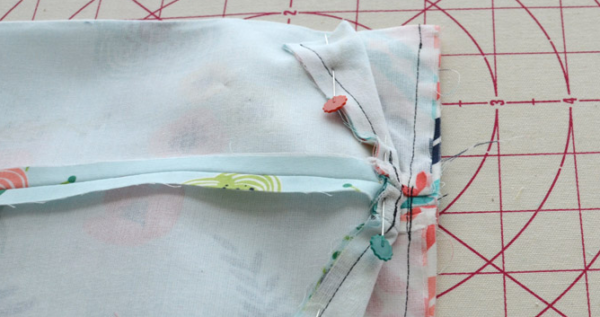
To finish the Pouse Bag, sew together both pieces of fabric with right sides facing each other and a 1/4″ seam allowance. Sew around two-thirds of the bag leaving one end open to turn it inside out. Now you’re ready to insert your pillow into its new home!
Step 18: Making Corners

You can make boxed ends with a bag by starting at one corner of the Outer fabric, and folding it until you create a triangle in that corner. Match up the seam on this side to meet with your crease line from its opposite side; once they are lined up perfectly, pin them together and mark 1 1/4″ of space around it using your Friction pen.
Draw stitching lines connecting all corners so that each pleat is enclosed within another layer – be sure not to leave any less than an inch when drawing these lines or else there will be gaps between boxes that should have been left open for stowing handles later!
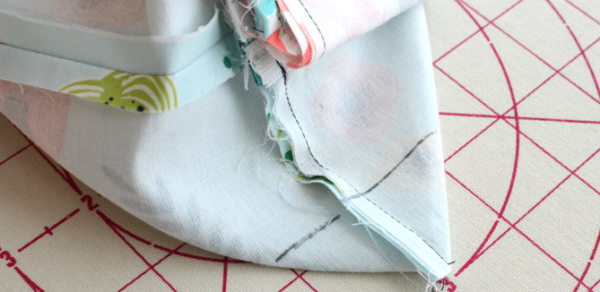
Now stitch on the line.
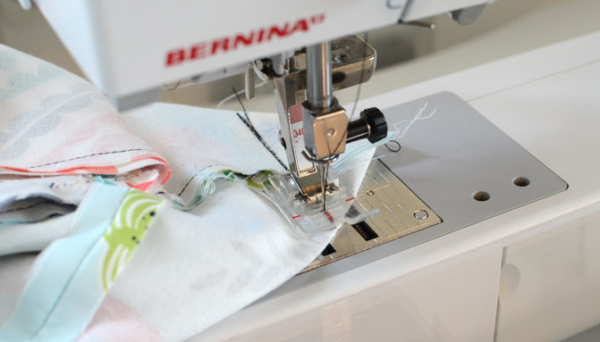
Once everything has been marked off, cut away triangles.

Step 19: Turning the Bag

At this point, it’s time to turn the bag inside out. Push the lining fabric back through until you find both ends of your lining on either side of what is now a boxy shape. Poke all eight corners with something sharp like a chopstick and then press them down one at a time so they look nice and neat.
Step 20: Finishing the Bag
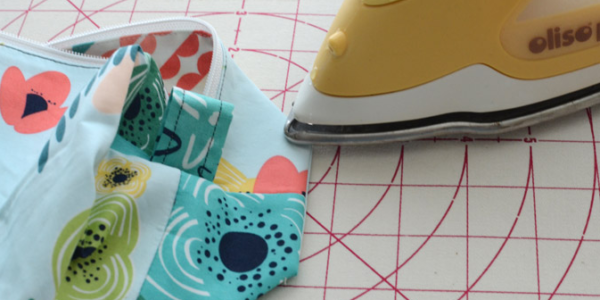
After many hours of work and a little bit more creativity, your bag is done! You may need to use something like a sleeve board or tissue paper for the finishing touches. The finished size of this bag is 7″ W x 4″ D x 3½” H (or 10″ Wx7 1/2″Dx4¾”).
Now you are finished.

For an even bigger purse, you can adjust these measurements accordingly- anything from 11″W by 9″. Whatever shape you want as long as it’s square with flat sides will be easy to create if you follow the pattern properly.
If you love this post, check this post as well: How to sew cushion covers with zippers.
Happy crafting!!

