Before you get to start stitching, you need to make sure that you know how to thread a sewing machine properly first. For seasoned sewers, threading a sewing machine is second nature, but on the other hand, don’t worry if it gets a bit overwhelming for you at first.
While each sewing machine from different manufacturers will have subtle differences in terms of their setup or configuration, there are still some general concepts that apply to all of them. And so, you can still effectively thread them using the same set of techniques.
We have a few clever tips to make things easier for you though. Read on!

Threading a sewing machine: Step-by-step guide
In essence, threading your sewing machine is a process where you load your upper thread as well as your lower thread to your machine so that it will then weave these threads together to stitch your material(s). This is the easy way to thread a sewing machine needle. Here’s your sewing machine thread guide!
1. Winding the bobbin.

What is a bobbin? A bobbin is what you’d call the lower spool of the thread of your sewing machine. There are pre-wounded bobbins that you may buy from stores or maybe you already have one from a previous project.
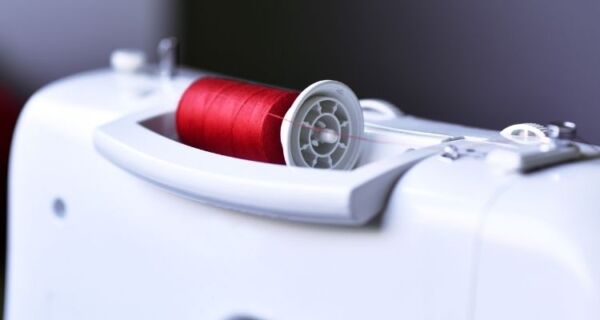
But if you don’t, you just need to wind a new one from your spool of thread. How to do this? Threading a bobbing is not so complex. All you have to make sure of is to put the spool of sewing thread to your machine’s thread pin right on top of your machine.
Then pull your thread to the left (of your machine) and make sure to wind it counterclockwise around its pre-tension disc that’s attached to the thread guide. Then you need to thread your thread to the 2 small holes in the empty bobbin.
Then you place the bobbin on your bobbin winder pin that’s usually found at the top right side just near the thread pin. Press on your machine’s foot pedal to start winding the bobbin. Wind until full, then make sure to trim the thread to remove it from your larger spool.
2. Load the bobbin.

The next thing that you have to do in threading a sewing machine is to load the wound bobbin. The wound bobbin goes into its compartment called the bobbin case that which in turn, will supply your lower thread as you sew or the machine operates.
To load the wound bobbin you need to lift the needles as well as the presser foot to its highest position and then remove your bobbin cover. Depending on your machine, it will either have a button for this mechanism or a handwheel.
Make sure to put your bobbin on the round slot as indicated in your sewing machine to ensure that your bobbin will unspool the right way. Then, be sure to pull the end part of the bobbin thread right through the machine’s tension spring and then replace your bobbin cover.
3. Place your spool.

This is where you go ahead and set up the upper thread. All you have to do is to place the spool of thread to your machine’s thread pin which is also called a spool holder or spool pin in case you may get confused.
4. Threading the thread guide.

This is where you pull the thread to the left side of your sewing machine and then thread it right through your thread guide.
5. Through the sewing machine’s U-shaped guide.

What you have to do next is to pull the thread right down the thread guide. Right into the deep groove in the front of your sewing machine. Then, you need to bring your thread up right into the 2nd deep groove at the left.
6. Through the take-up lever.

We’re almost done now and as you can see, these are all easy ways to thread a sewing machine needle. What you have to do next is to wrap your thread in the thread take-up lever.
Right at the top of your sewing machine, in the second groove, there should be a metal hook that is called a take-up lever. That is where you wrap your thread around.
7. Threading needle on sewing machine.

You know we are getting close to finishing when we’re already at the point of threading the needle.
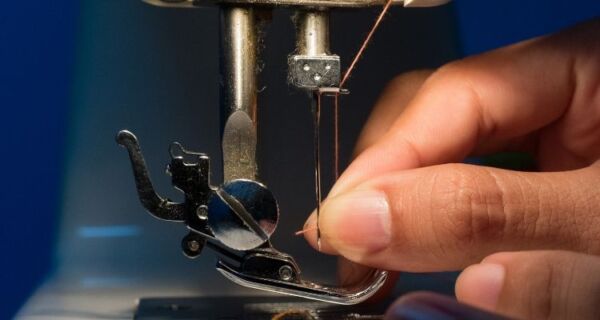
To do this, you need to pull the thread down in the sewing machine’s direction and then thread the eye of your needle from front to back. Keep on pulling your thread until you get several inches of the thread through the needle.
But, please do take note that some machines will have their very own auto needle threader. Despite these instructions, we also do advise you to check your sewing machine’s instruction manual just in case there are aspects to your sewing machine that these generic steps won’t take into consideration.
8. Catch your thread.

The last thing that you have to do once both your upper thread and bobbin are set up is to catch the thread. That means, you need to connect both threads so then they would be ready to be utilized in sewing.
Lower your needle down and up again with either your needles-position button or knob. As you do this, the bobbin thread will be caught by the needle so it will pull it back up in a loop.
Then, a technique is to utilize a flat object like a ruler underneath the needle to then grab both your lower and upper strands and get them ready for stitching.
Check this video tutorial to learn more about threading your basic sewing machine.
Conclusion
We would like to conclude this article with a few other helpful tips on how to thread a sewing machine. Be sure to cut the end of your thread with really sharp scissors so you’re sure that its strands won’t get in the way.
And also, a moist end of the thread is easier to “thread” most of the time. Wear glasses with the appropriate prescription too so you can do your work more efficiently.
Having a sewing machine handy whether you sew for a living or just use it for personal projects or tasks goes a long way. It’s one fun hobby at the very least.
So do enjoy your stitches from the moment you’ve successfully thread that needle.
Sources:


